Introduction
This document is meant to explain how to create a Open Graph action in Facebook, submit your first OG and then get your approval from Facebook.
Social Graph
In order to understand open graph, we shall first understand social graph. As name suggests, it’s a graph connecting users by means of social relationship. Eg: User1 is a friend of User2, User1′s spouse is User4 and so on. It’s not just a user relationship with another user but with other objects as well. Eg: User1 watched a video on youtube. In the above social graph action, “video” is the social graph object and “watch” is the social graph action or relationship of User1 with the social graph object, video. A pictorial snippet of a large open graph is given below (source):
The first image shows how a social graph looks like from way above and the second is a zoomed in version.
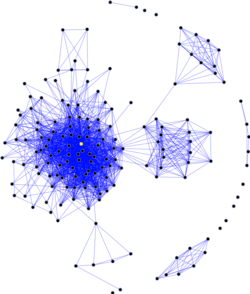

So, basically, social graph tries to define the real world social relationships of everyone with every other objects (other people, items, etc). Simplifying a bit more, social graph defines the relationship of social objects. A social object can be a user, item or anything in the world.
Facebook Open Graph Protocol
Its easy – Open Graph Protocol allows a developer to define and integrate social graph on their websites. The relationship will however be tracked at Facebook but the medium to update relationship is provided by developer website. For example, a website can have a like button and clicking on the button updates your Facebook account – you liked their website. If you reconsider the above line one more time, we will understand that data is transferred to Facebook from the website in order for Facebook to understand the social interaction. Facebook is not human and cannot understand what open graph action just took place. Simply put, Facebook needs to understand that, the social object (user) has performed a social action (like) on another social object (website). The question is, how do we transfer the open graph data?
OG metadata
The answer is, using metadata tags. A sample is given below:
<meta property="fb:app_id" content="APP_ID" />
<meta property="og:type"   content="velublog:process" />
<meta property="og:url"    content="http://demo.ksankaran.com/fbogdemo/createtestog.html" />
<meta property="og:title"  content="Sample Custom OG Creation Demo" />
<meta property="og:image"  content="http://ksankaran.com/img/MyWebsiteLogo-75x75.jpg" />
Let’s take a deeper look at the above lines. All OG tags start with “og:”. The title defines the title of the object being interacted. The type defines the type of object being shared and based on type, it may/may not be required to provide additional attributes. For example, a Recipe object needs data like name of the recipe, time taken to prepare, etc. For complete list of tags with their meaning: please read here.
Step by Step Process
DEMO: Click here for posting a custom OG from my blog.
Before we go to the process, it is ideal and recommended that the page on which the OG resides is in descent shape. The HTML shown below is a quick way to submit your OG action but never enough for review submission.
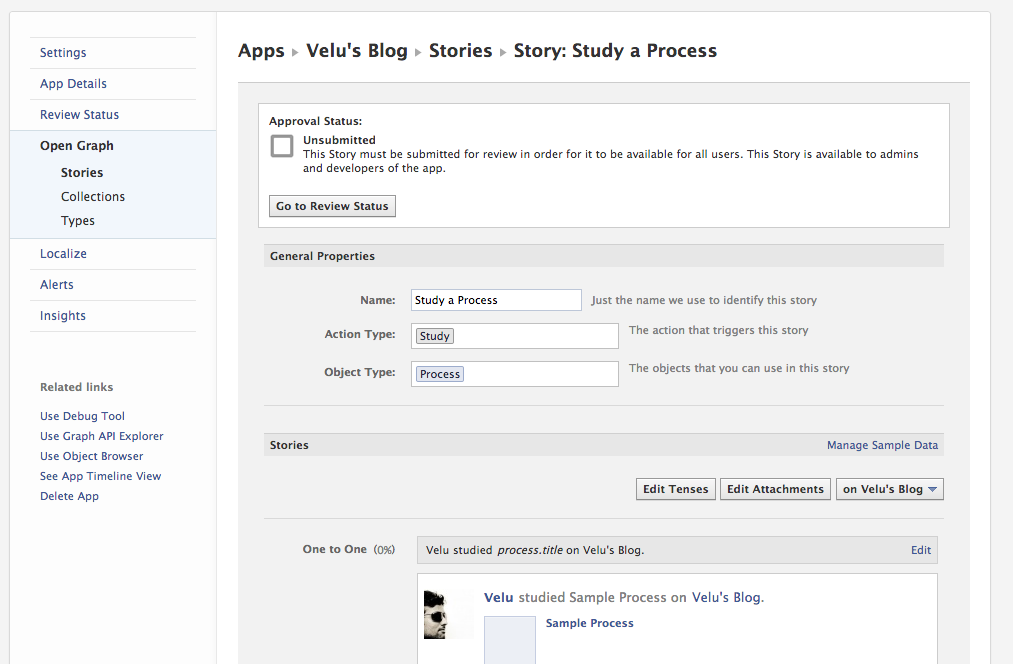
First, go to developers.facebook.com and choose Apps at the top nav. Now, select the app on which you have to create the action. For this document, I will be using my blog’s app that I own. When you get to the app, click on “Edit App” and get to Open Graph. Click on “Create a Story”. Now for this document purpose, I have created an action “Study” and object “Process”. After you submitted that form, you should see the detail as listed below.
Navigate to Open Graph (left nav) -> Types and select the newly created object “Process” and at the bottom, choose the right set of permissions you need.

Now, go on to “Review Status” on the left nav and you will see that your object submission is now grayed out.
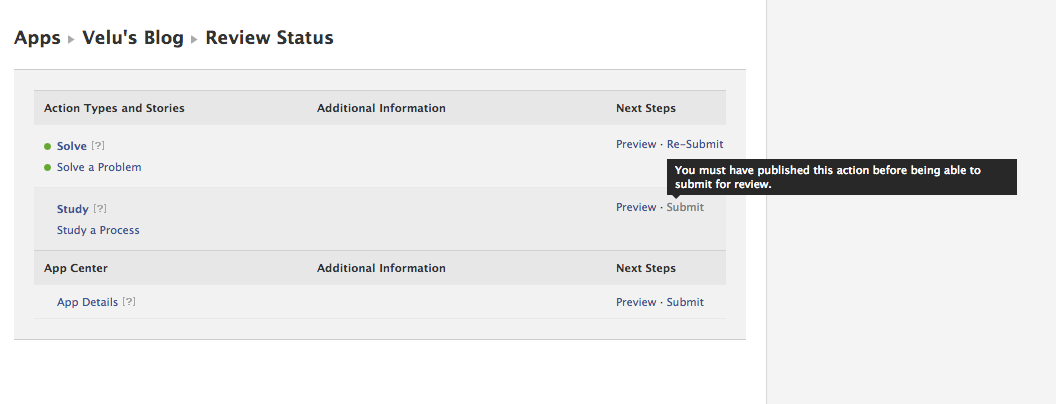
This means, you need to create a sample page and submit the OG to Facebook to create your first OG action before your submit this action to public.
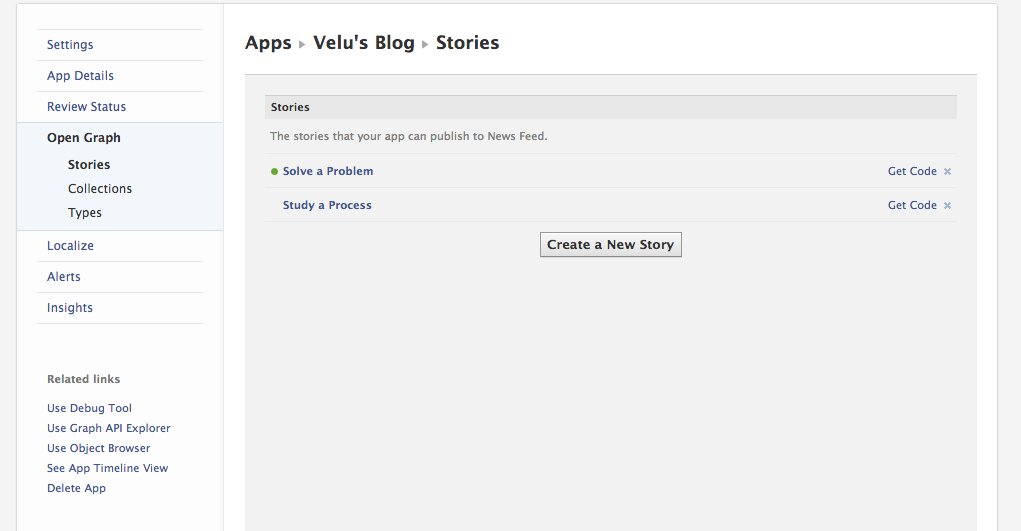
In order to create the action, you need to create a sample page and then execute code from there. Go to open graph -> stories and click on “Get Code” on your new object.
Select “Code for Object”
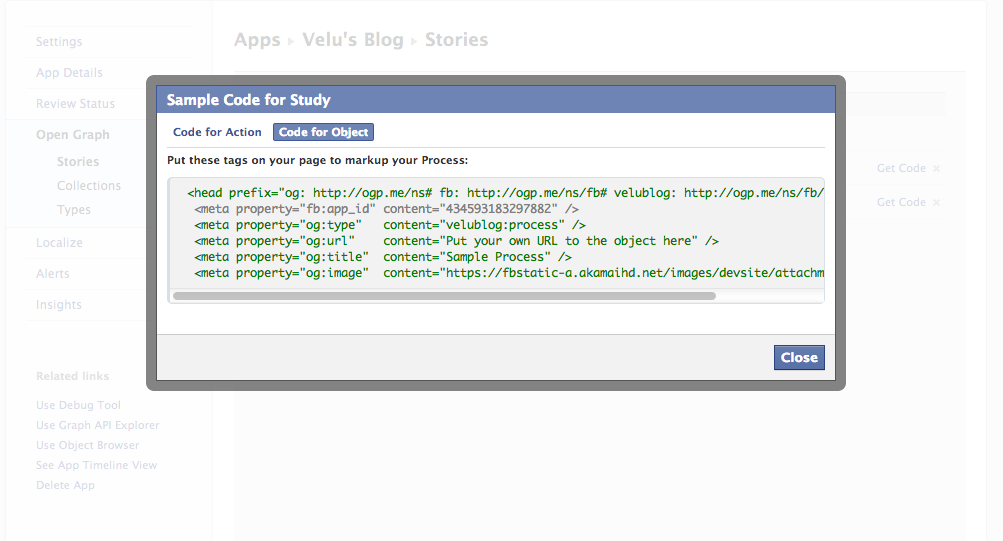
Now copy the code and paste into HTML. Also, add your own code to it to allow it to submit the OG.
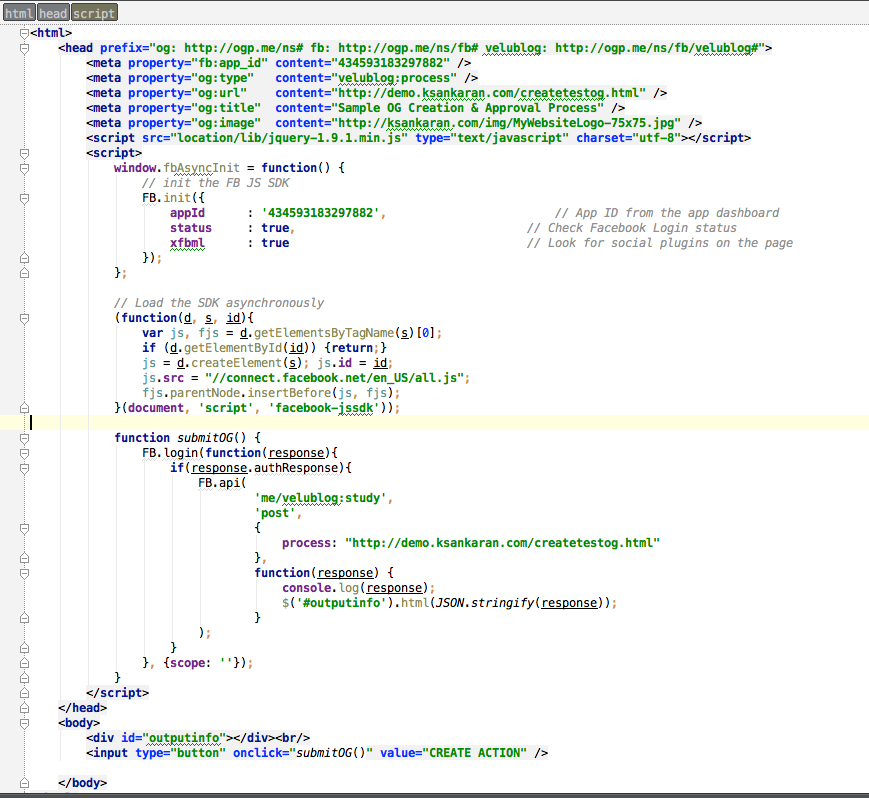
Not the best code but it will work. For you convenience, I’m sharing this code (link here).
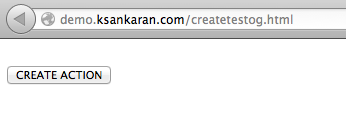
When you load the page, it should look like this:
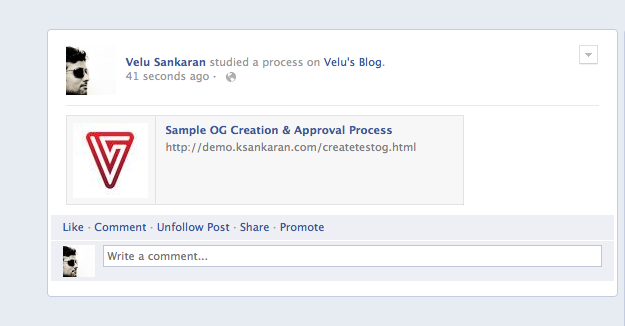
Click on the button and make sure you login with the ID who created the action. The output should look like below:

Copy the id that comes up and append it to facebook.com:
![]()
It should take you to your newly created activity:
Now, you should see the submit button enabled in your APP:
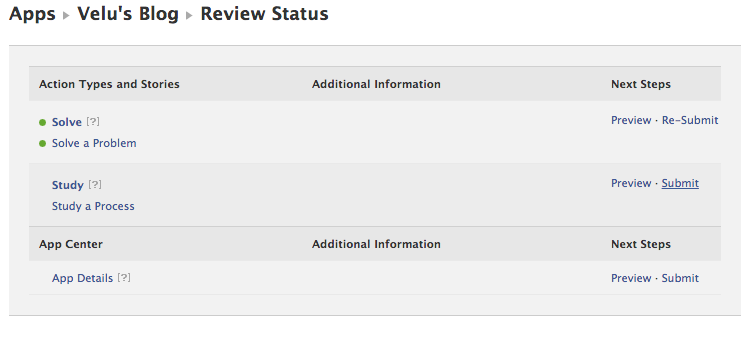
Click on submit and it will pull up this form like below. BUT, I would strong suggest our production page is ready before the submission process. Or at least a quality working page.
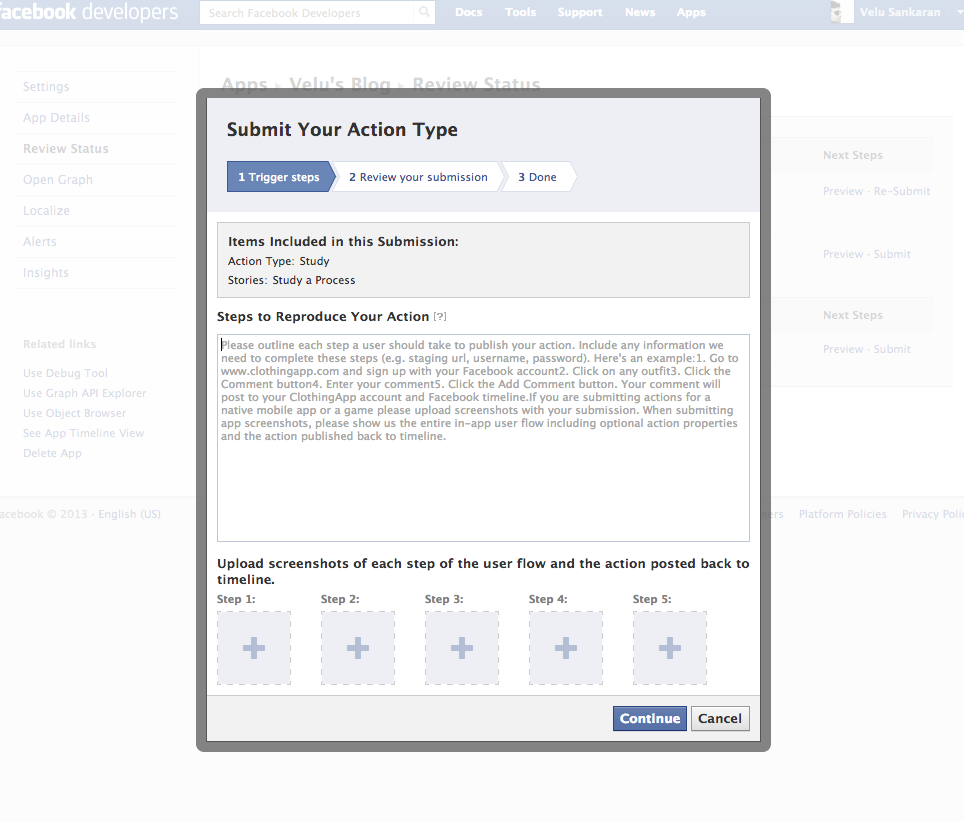
Filling this form is straightforward and needs to be done by the product owner.