Introduction

This article assumes that the user is aware of the process by which a webpage renders on a browser, how the resources are fetched, etc. The document also assumes that the user have basic understanding of browser caches and cache headers. This article provides the basic information on using appcache and a demo page to explain its benefits.

AppCache vs Browser Cache

When a page is requested on the browser without appcache, there will be a sequence of network requests sent from the browser to the server. The first request is the actual page (raw html) you wanted to load. Then browser reads the html and process them line by line. Every script tag, css link tag or any other resources on the page are requested sequentially. Each of this requests may be cached in the browser and this forms the browser cache. I said “may be” because the rule for a resource getting cached is: resource headers sent from your server. See example below:
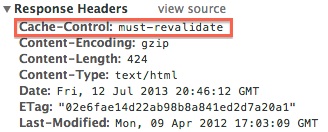
cachecontrolexample

So, it is evident that a browser cannot cache these items unless and otherwise, we visit the page and also depends on headers received for individual resources. But, what if you want to cache the extra few items that needed to display next page? What if, your website need to work offline and sync only when needed or when the user gets online? What if, you have a website which have separate layer for presentation/logic and separate layer for data and like to store all the presentation/logic offline? The answer is simple and straightforward: AppCache.
Now, let’s not get excited and convert all our websites to webapp. HTML5 AppCache is designed for offline webapps – make no mistake. A simple error such as app-caching a dynamic data would result in rendering outdated website. So, it takes time to understand AppCache and make sure you appcache the right set of resources.

How to do it?

Well, its pretty simple. Write a manifest file describing the items to be cached, network behavior, fallback, etc and mention the manifest in the HTML. That’s it.
A sample would be below:

CACHE MANIFEST
# ======================================
# AppCache Manifest - version 0.1
# ======================================
CACHE:
#JS files
#CSS files
#Images
NETWORK:
# Resources that require the user to be online.
FALLBACK:
# static.html will be served if main.py is inaccessible
/main.py /static.html
# offline.jpg will be served in place of all images in images/large/
images/large/ images/offline.jpg
# offline.html will be served in place of all other .html files
*.html /offline.html

NOTE: The CACHE MANIFEST string should be the first line and is required.
CACHE:
This is the default section for entries. Files listed under this header (or immediately after the CACHE MANIFEST) will be explicitly cached after they’re downloaded for the first time.
NETWORK:
Files listed under this section are white-listed resources that require a connection to the server. All requests to these resources bypass the cache, even if the user is offline. Wildcards may be used.
FALLBACK:
An optional section specifying fallback pages if a resource is inaccessible. The first URI is the resource, the second is the fallback. Both URIs must be relative and from the same origin as the manifest file. Wildcards may be used.
Now add the manifest to the html file.

<html manifest="example.appcache">
  ...
</html>

Cache Update

The tricky part is updating the cache items. When the content on the server is changed, the browser will not know the change and will continue to use the outdated data on the webpage. The appcache manifest should be fetched everytime by the browser to determine the items that has to be refreshed. Hence, it is VERY IMPORTANT to make sure appcache manifest is never cached by the browser or at least not for a long time. For that, it is important that the headers sent by the webserver for the manifest also includes the expiry time. It is also possible to update the appcache via the javascript like

var appCache = window.applicationCache;
appCache.update(); // Attempt to update the user's cache.
...
if (appCache.status == window.applicationCache.UPDATEREADY) {
  appCache.swapCache();  // The fetch was successful, swap in the new cache.
}

It is also possible to clear the cache when the user clears the same in his/her browser. However, that is not a valid workflow for updating the cache.

The Gotchas

The appcache also caches the base page. This means, if you later change the base page to include an additional library or UI, it will not be fetched from server unless there is a manifest file update. In order to bypass this functionality, it is ok to include the appcache in a temporary html and include the temp html as an iframe in the base page (See demo link below). By this way, you still cache the manifest items but the base page will not be cached by the appcache unless specified in the manifest.

Demo link

Conclusion

We saw the basic differences between appcache and browser cache with a basic example to include app caches. The example link also shows how to include the appcache by not affecting the cache of the base page by providing manifest in a temp html and loading the same in a iframe.

Introduction

The article explains how to generate dynamic script from a backend language, such as PHP in this case. There are many reasons to choose a dynamic script over generation of JSON data that client can write script on such as 1) Restrict the client from manipulating data. 2) just provide a helper API that would just do the job. 3) Formation of feasible JS data structure is not possible.

Prerequisites

The article assumes that user knows PHP and JavaScript basics. We will be trying to read the .properties file from php, parse the configuration, understands what user wants to, prints the logic in JS and load the same in HTML to test the logic. I would also recommend you have some basic knowledge on recursive method call techniques as well. To know more on recursion, please read here.

Defining a Problem Statement

Let’s try and define the problem we are trying to solve. Consider a use-case where you have a properties file on the server and we have to use this file to show a message in the front end. Well, it is not a straightforward map of key1 to value1. Assume that, it is complex configuration of three level key to a value and each level can have wild card character ‘?’ to accept any value at that level or contain range at every level. Example: “28|71-100|?=text3″ -> if level1 value is 28 and level2 value is between 71 and 100 and level3 at any value, then the text to be used is “text3″.

Parse Properties and Generate Script

Assume that our file has one configuration per line and the first step is to understand the properties file and getting ready for generation.

$key1 = 't';
$key2 = 'w';
$key3 = 't';
function get_object_from_params($paramStr, $assignValue, $label) {
    if($paramStr == '?') {
        $paramObj = Array(
            $label => $assignValue
        );
    }
    else {
        $ranges = preg_split("/-/", $paramStr);
        if(count($ranges) == 2) {
            $paramObj = Array(
                ">" => $ranges[0],
                "<" => $ranges[1],
                $label => $assignValue
            );
        }
        else {
            $paramObj = Array(
                "==" => $ranges[0],
                $label => $assignValue
            );
        }
    }
    return $paramObj;
}
 
function parse_icon_config($txtProperties) {
    $result = array();
    $lines = preg_split("/\n/", $txtProperties);
    global $key1, $key2, $key3;
    foreach($lines as $i => $line) {
        $lineparts = preg_split("/=/", $line);
        $textvalue = $lineparts[1];
        $configparts = preg_split("/\|/", $lineparts[0]);
        if(count($configparts) == 3) {
            $windSpeed = $configparts[2];
            $temp = $configparts[1];
            $iconCode = $configparts[0];
 
            $windObj = get_object_from_params($windSpeed, $textvalue, $key3);
            $tempObj = get_object_from_params($temp, $windObj, $key2);
            $iconObj = get_object_from_params($iconCode, $tempObj, $key1);
 
            array_push($result, $iconObj);
        }
    }
 
    return $result;
}
 
$properties = file_get_contents('config/iconconfig.properties');
$propertiesObj = parse_icon_config($properties);

The above snippet parses the configuration file and generates array of config objects – one per each line. Since there is a three level key and each level parsing is almost the same, lets write a recursive method to generate the script.

function recursive_print($obj, $label) {
    global $key3;
    if(is_string($obj)) {
        return ('return \'' . $obj . '\';');
    }
 
    foreach ($obj as $key => $value) {
        if($key != '==' && $key != '>' && $key != '<') {
            $nextLabel = $key;
            $nextObj = $value;
        }
    }
    if(array_key_exists("==", $obj)) {
        return 'if(' . $label . '==' . $obj['=='] . '){' . recursive_print($nextObj, $nextLabel) . '}';
    }
    else if(array_key_exists(">", $obj) && array_key_exists("<", $obj)) {
        return 'if(' . $label . '>' . $obj['>'] . ' && '. $label .'<' . $obj['<'] . '){' . recursive_print($nextObj, $nextLabel) . '}';
    }
    else {
        return 'if(true){' . recursive_print($nextObj, $nextLabel) . '}';
    }
}
 
function get_function_text($iconCodesConfig) {
    global $key0,$key1,$key2;
    $functionCode = '';
    foreach ($iconCodesConfig as $iconConfig) {
        $functionCode .= recursive_print($iconConfig, $key0);
    }
    return 'window.getDynamicText = function('.$key0.','.$key1.','. $key2.'){' . $functionCode . 'return \'not found. some default value.\'}';
}

At each level, we analyze the data and print the appropriate conditionals in the JavaScript and then call the same method again with the next level until we reach the last level.

Our javascript generation is ready, when the PHP is requested, this is what we get:
jsgenresponse

Now, using it in our HTML is quite easy. As many other APIs out there, it loads in the window namespace and waits for us to call.

<script src="jsgen.php"></script>
....
<button ... onclick="validateAndGet()">Get Dynamic Text</button>

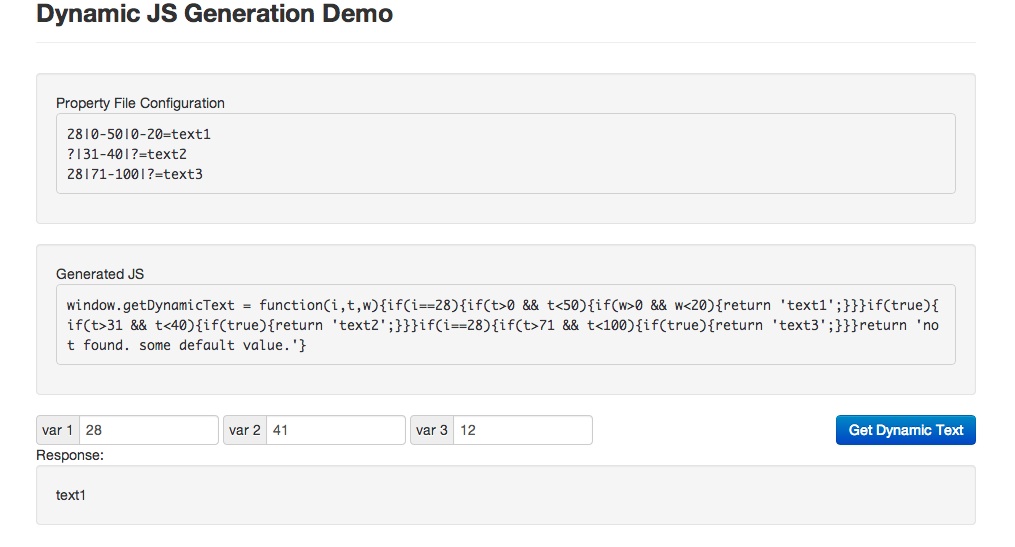
Here is a demo link.

demosnap

Conclusion

What did we just do: we discussed a set of use cases when we need a dynamic script rather than just data, picked up a particular scenario and worked on the same to generate a dynamic javascript using PHP and recursion techniques.

Prerequisites

The article assumes the reader knows the basics of AngularJS. The article shows how the cache logic can be written in JavaScript but the UI render is done using AngularJS. A non-angular reader can still choose to continue reading through the article and can get the logic bits from the code. I leave it up to you.

Introduction

In real world, where we have CMS (Content Management System) to assemble our page with modules and each module function independently. The modules are developed by independent developers and the page is assembled by, probably, a different user altogether. AJAX calls are always meant to enhance user experience, but given the fact the each module function independently, there seems to a duplication of AJAX calls made on the page, probably by different modules. This post shows a way, how to cache such AJAX calls with the help of jQuery promise and a JavaScript object.

jQuery Promises

As name suggests, jQuery Promise is a literal promise made by jQuery that a call will be made on the object after its completion. The object is just like an JavaScript object and can be passed around like a ball to any method you want and any number of times you want. For more, read here.

Details

Now that you have an idea of what we are going to do, let me take you through each step of the process.

Constructing an deferred object cache

I will try not to include AngularJS code in the sample but in some places it is unavoidable. Assuming that “command” is the part of the URL and “params” are the parameter key-value map, here is a snapshot of constructing a cache map.

var cacheStorage = {};
 
function getCacheKey(command, params) {
    var paramStr = command + '-';
    if(params) {
        var keys = [];
        for(var key in params) keys.push(key);
        var sortedKeys = keys.sort();
        for(var count=0; count < sortedKeys.length; count++) {
            var sKey = sortedKeys[count];
            paramStr += (sKey + '-' + params[sKey] + (count < sortedKeys.length-1 ? '-' : ''));
        }
    }
    return paramStr;
};
 
var ret = {
    get : function(command, params) {
        var paramKey = getCacheKey(command, params);
        var cachedObj;
        if(paramKey.length > 0) {
            cachedObj = cacheStorage[paramKey];
        }
        if($rootScope.debug) {
            $log.log(paramKey + " => " + (cachedObj ? 'hit' : 'undefined'));
        }
        return cachedObj;
    },
 
    put : function(command, params, deferredObj) {
        var paramKey = getCacheKey(command, params);
        if(paramKey.length > 0) {
            cacheStorage[paramKey] = deferredObj;
        }
    }
};
 
return ret;

Explanation: If you know Angular, you probably knew about $log and $rootScope. If not, just assume that these are variables injected by Angular API. The cache tries to form a key and save the object in the cache map for the key. We sort the params before forming the key because we do not want to duplicate the same object just because user gave params in a different order.

Data Source Client

Now that, our cache is ready, we need to implement a client which uses this cache and can be a interface to all the modules on the page. The requirements of the client is, to provide a generic interface to all the calls to a particular website because we wrote the cache store for a single domain. If multiple domains are involved, it is only a matter of time we edit the cache storage to modify key that includes domain name or the complete url.

var url_defaults = { key: $rootScope.key };
 
function doDSCmd( command, params ) {
    if(!params) { params={};}
    var cachedObj = dsCacheStore.get(command, params);
    if(cachedObj) {
        return {
            'deferredObj' : cachedObj,
            'fromCache' : true
        };
    }
    var url = $rootScope.server + "/" + command + ".json";
    var deferredObj = $http.get(url, { params: angular.extend( {}, url_defaults, params ) } );
 
    deferredObj.success(function (data, status) {
            if($rootScope.debug) {
                $log.log(command + ": " + JSON.stringify(data));
            }
        })
        .error(function (data, status) {
            $log.error("error $http failed with " + status + " for " + url);
        });
 
    dsCacheStore.put(command, params, deferredObj);
    return {
        'deferredObj' : deferredObj,
        'fromCache' : false
    };
};
 
var ret = {
    executeCommand : function(command, params) {
        return doDSCmd(command, params);
    }
};
 
return ret;

Explanation: We are trying to provide a interface with just one public method: executeCommand – which means executing a JSON call. The client is trying to read from cache and if not found, it creates a promise object by var deferredObj = $http.get(url, { params: angular.extend( {}, url_defaults, params ) } );. Consider this, as a jQuery equivalent of $.ajax(). Now, this promise is stored in the cache. Next time, when we get a hit from the cache, we get the promise object. Since, you always get a promise object, your module can always use .success on the promise every time it executes. If the call is already completed, your .success callback is called immediately else it waits. Here is the trick, since you are not creating a new promise, AJAX call is NOT made. Instead, it works on the existing promise object and gets the response from the promise – how many ever times you want.

Sample Module Usage

Here is an example of how to call from a module.

var commandOutput = dsClient.executeCommand(callObj.call, callObj.params);
var fromCache = commandOutput.fromCache;
commandOutput.deferredObj.success(function(response) {
     .....
});

NOTE: The JSON call is used for demo purposes. However, JSONP also works and you just have to change from $http.get to $http.jsonp.

Here is a complete

demo

Conclusion

What did we just do: We learned a bit about jQuery promise, how to implement a cache store that stores jQuery promises for a given url and params, how to implement a client API which makes of cache store and provide a public interface to make AJAX calls and how to write a module that makes use of the client.

Introduction

This article will discuss on the various image loading techniques in web and functionality of each of them. Mostly, we write img tags and leave it at that and we don’t care what happens from there. But, it’ll really comes back to haunt us later when there are plenty of images on the site and web site drags itself.

Techniques

Baseline JPEG rendering

DEMO: link here
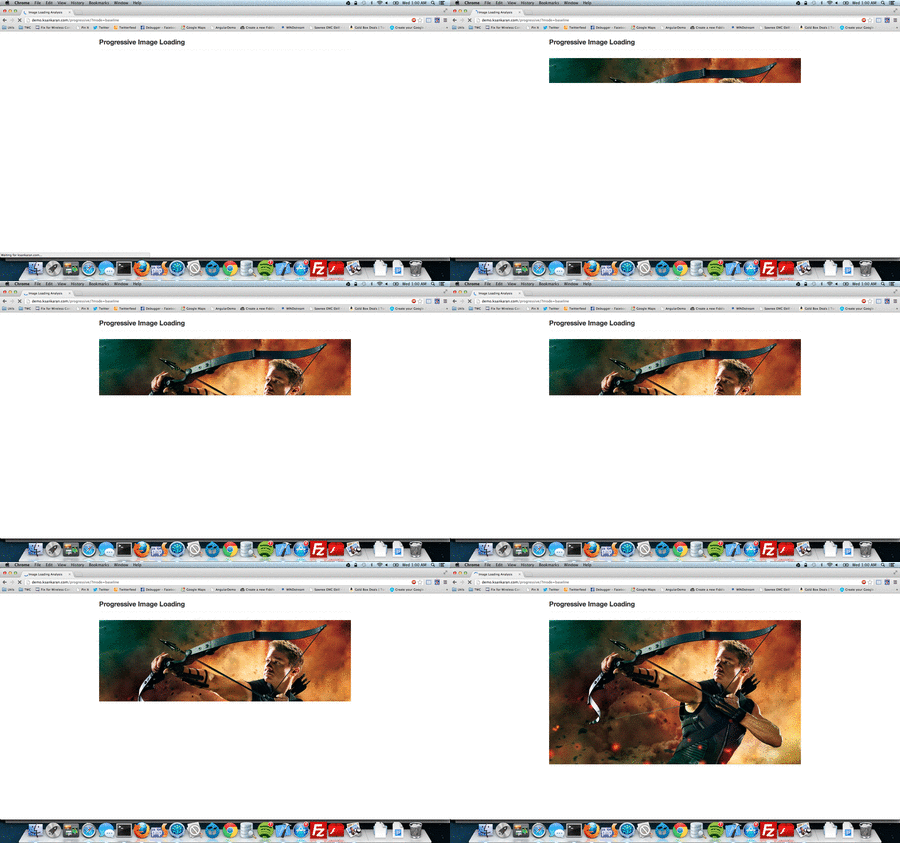
Baseline JPEGs are the default JPEG files we use. The images are rendered from top to bottom with each layer after another. Please look at the below GIF for understanding the loading process.

baseline-anim

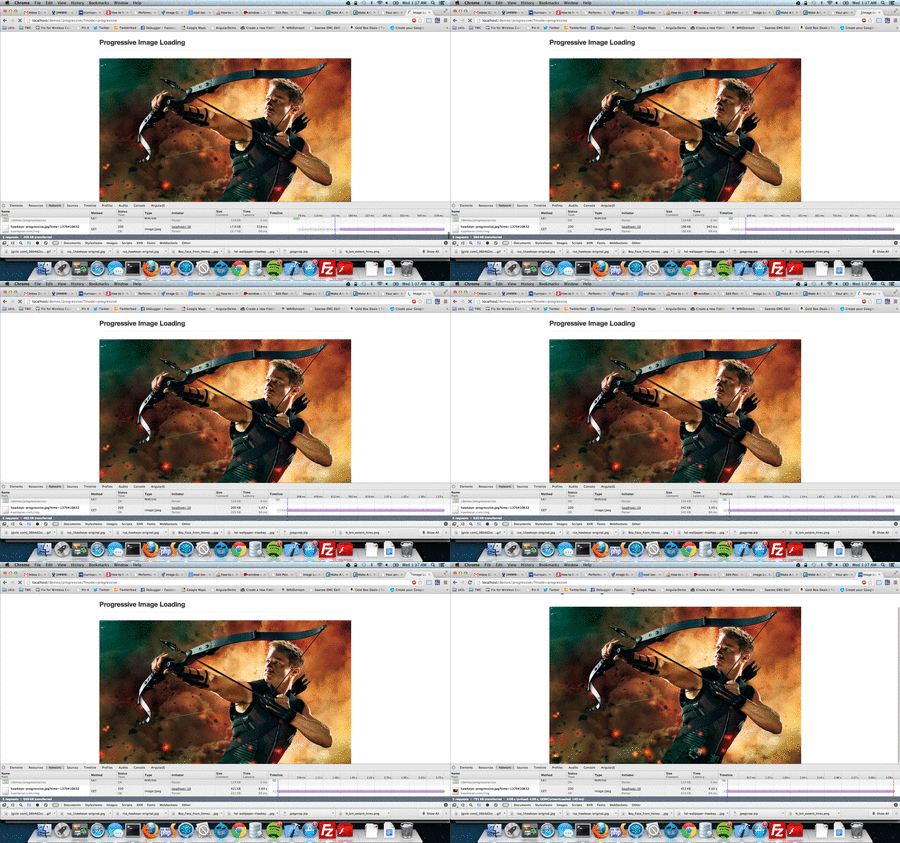
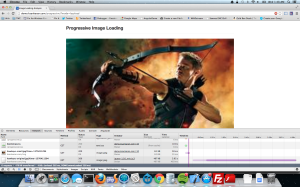
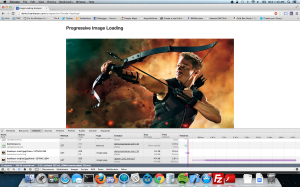
Now to the details, the image is fetched from the server and as soon as it gets a line, it draws there. As you can see from a test below, it took 7.6 seconds to complete the image rendering and the spinner was spinning till the end – which means, you are having a bad user experience of just painting few lines of image every second and though the document got ready, the end user is under the impression the document is still loading.

baselineloading

Progressive JPEG rendering

DEMO: link here
Progressive JPEGs are special kind of JPEGs which has to undergo few processes to create progressive JPEG from normal JPEG. The progressive JPEGs render in a different way – interlaced. Meaning, all the rows are rendered with first with minimum detail and as download progresses, the quality of image improves.

progressive-anim

As you can see, the entire picture is visible right from the time page is loaded except the data is fetched continuously to enhance the picture.

Both, baseline and progressive will delay the load event.

Creating Progressive Images (Mac OS X)

jpegtran -copy none -optimize hawkeye-original.jpg > hawkeye-opt.jpg
jpegtran -copy none -progressive hawkeye-opt.jpg > hawkeye-progressive.jpg

Progressive takes almost the same computation memory and won’t bring the browser down. However, JPEGs are a compressed format and progressive is much more optimized in it but this cannot be said for other formats. PNG renders better than JPEG in progressive.

Simulate Progressive with JS

DEMO: link here
This is an idea to load the cheapest version of the image first and in a separate thread update with a HD version.

lazy1


lazy2


The image attribute should have low quality src and a reference to high quality src for us to load later.

<?php 
     <img refresh="http://ksankaran.com/img/hawkeye-original.jpg?time=<?php echo time(); ?>" src="http://ksankaran.com/img/hawkeye-small.jpg?time=<?php echo time(); ?>" width="100%">
?>

On document ready, create a timeout thread to update the src:

$(document).ready(function() {
     window.setTimeout(function() {
           $('img[refresh]').each(function(idx, element) {
                 var refreshURL = $(element).attr('refresh');
                 $(element).attr('src', refreshURL);
           });
     }, 200);
});

With this JS simulation, we get a better user experience and document load is fired right after the low quality version is loaded. The only disadvantage is, increased network traffic with small and HD version loading for every image. However, if it is used for only HD images on the page, this is an great approach.

Introduction

This document is meant to explain how to create a Open Graph action in Facebook, submit your first OG and then get your approval from Facebook.

Social Graph

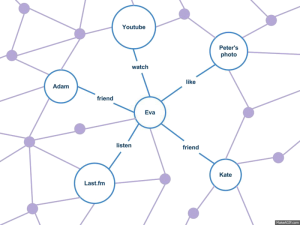
In order to understand open graph, we shall first understand social graph. As name suggests, it’s a graph connecting users by means of social relationship. Eg: User1 is a friend of User2, User1′s spouse is User4 and so on. It’s not just a user relationship with another user but with other objects as well. Eg: User1 watched a video on youtube. In the above social graph action, “video” is the social graph object and “watch” is the social graph action or relationship of User1 with the social graph object, video. A pictorial snippet of a large open graph is given below (source):

The first image shows how a social graph looks like from way above and the second is a zoomed in version.

1 2

So, basically, social graph tries to define the real world social relationships of everyone with every other objects (other people, items, etc). Simplifying a bit more, social graph defines the relationship of social objects. A social object can be a user, item or anything in the world.

Facebook Open Graph Protocol

Its easy – Open Graph Protocol allows a developer to define and integrate social graph on their websites. The relationship will however be tracked at Facebook but the medium to update relationship is provided by developer website. For example, a website can have a like button and clicking on the button updates your Facebook account – you liked their website. If you reconsider the above line one more time, we will understand that data is transferred to Facebook from the website in order for Facebook to understand the social interaction. Facebook is not human and cannot understand what open graph action just took place. Simply put, Facebook needs to understand that, the social object (user) has performed a social action (like) on another social object (website). The question is, how do we transfer the open graph data?

OG metadata

The answer is, using metadata tags. A sample is given below:

<meta property="fb:app_id" content="APP_ID" />
<meta property="og:type"   content="velublog:process" />
<meta property="og:url"    content="http://demo.ksankaran.com/fbogdemo/createtestog.html" />
<meta property="og:title"  content="Sample Custom OG Creation Demo" />
<meta property="og:image"  content="http://ksankaran.com/img/MyWebsiteLogo-75x75.jpg" />

Let’s take a deeper look at the above lines. All OG tags start with “og:”. The title defines the title of the object being interacted. The type defines the type of object being shared and based on type, it may/may not be required to provide additional attributes. For example, a Recipe object needs data like name of the recipe, time taken to prepare, etc. For complete list of tags with their meaning: please read here.

Step by Step Process

DEMO: Click here for posting a custom OG from my blog.

Before we go to the process, it is ideal and recommended that the page on which the OG resides is in descent shape. The HTML shown below is a quick way to submit your OG action but never enough for review submission.

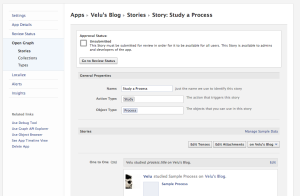
First, go to developers.facebook.com and choose Apps at the top nav. Now, select the app on which you have to create the action. For this document, I will be using my blog’s app that I own. When you get to the app, click on “Edit App” and get to Open Graph. Click on “Create a Story”. Now for this document purpose, I have created an action “Study” and object “Process”. After you submitted that form, you should see the detail as listed below.

1

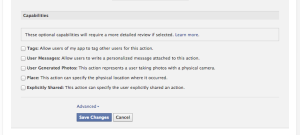
Navigate to Open Graph (left nav) -> Types and select the newly created object “Process” and at the bottom, choose the right set of permissions you need.

2

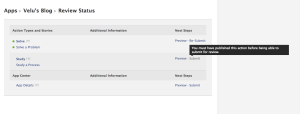
Now, go on to “Review Status” on the left nav and you will see that your object submission is now grayed out.

3

This means, you need to create a sample page and submit the OG to Facebook to create your first OG action before your submit this action to public.

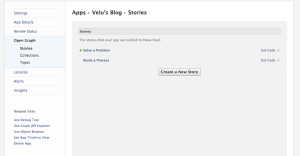
In order to create the action, you need to create a sample page and then execute code from there. Go to open graph -> stories and click on “Get Code” on your new object.

4

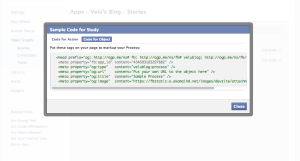
Select “Code for Object”

5

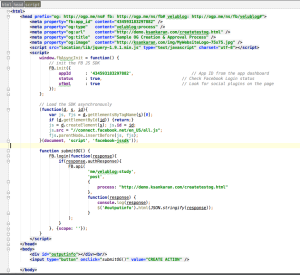
Now copy the code and paste into HTML. Also, add your own code to it to allow it to submit the OG.

6

Not the best code but it will work. For you convenience, I’m sharing this code (link here).

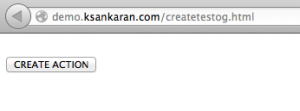
When you load the page, it should look like this:

7

Click on the button and make sure you login with the ID who created the action. The output should look like below:

8

Copy the id that comes up and append it to facebook.com:

9

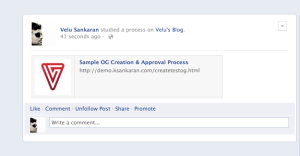
It should take you to your newly created activity:

10

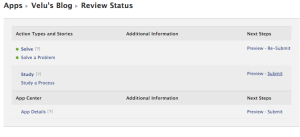
Now, you should see the submit button enabled in your APP:

11

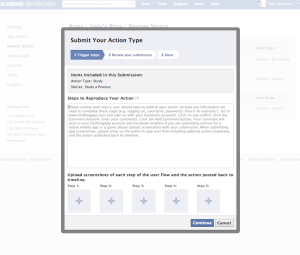
Click on submit and it will pull up this form like below. BUT, I would strong suggest our production page is ready before the submission process. Or at least a quality working page.

12

Filling this form is straightforward and needs to be done by the product owner.


Introduction

Yeoman is a very good framework for doing three things 1) scaffolding 2) dependency management and 3) build, preview & test. Yo is the component which does the code scaffolding and we are going to look a bit deeper on how to tune the generators to suit our need and structure.

Installing Yeoman and Git Protocol Problems

When dependencies are pulled via github, the protocol followed is git:// and is blocked by firewall at few places. In order for that to resolve, you need to make sure git uses http(s) instead of git. So, please execute the following line to make sure GIT follows HTTP protocol.

git config --global url."https://".insteadOf git://

After the above steps you should not have problems when using npm install or bower install.

npm install generator-angular generator-karma  # install generators
yo angular                     # scaffold out a AngularJS project
npm install && bower install   # install default dependencies
bower install angular-ui       # install a dependency for your project from Bower
grunt test                     # test your app
grunt server                   # preview your app
grunt                          # build the application for deployment

Yeoman Generators

If you take a look at line 1 on the above snippet, if installs angular generator. So, lets take a look at how to scaffold out a AngularJS directive:

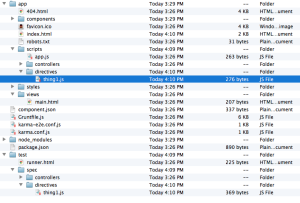
vsankaran-ml2:yeoman3 ksankaran$ yo angular:directive thing1
   create app/scripts/directives/thing1.js
   create test/spec/directives/thing1.js

When you install angular generator using “npm install angular-generator”, it may not installed in the actual yo library for users in Mountain Lion (10.8) or greater. So, if you execute the command “yo angular:directive thing1″, you might get an error saying that generator is not registered. To fix, please execute the following commands.

cd /usr/local/lib/node_modules/yo
npm install generator-angular

As you can see from above, it creates two things: 1) the directive itself and 2) the test case for the directive. This is where Yeoman’s strength is.

yo1

Modify Generator Behavior

Ok, now that we have scaffolded out a directive, how do I make sure that we scaffold out in a proper structure that we wanted to? The answer is not simple and we have to modify generator’s source to achieve that. I know, this is extremely dangerous, but the path and other stuffs is “hardcoded” in the generator code. Before we dig deep into the generator code, please understand that the generator code is located at: /usr/local/lib/node_modules/yo/node_modules/generator-angular.

Now, lets take a look at directive generator code snippet in index.js inside directives (which is inside the generator code) folder:

Generator.prototype.createDirectiveFiles = function createDirectiveFiles() {
  this.appTemplate('directive', 'scripts/directives/' + this.name);
  this.testTemplate('spec/directive', 'directives/' + this.name);
  this.addScriptToIndex('directives/' + this.name);
};

The line this.appTemplate generates the directive file inside script/directives folder. Now we wanted to pass in an extra argument to accomodate module parameter, so that the file gets dropped at scripts/module_name/directives folders (this is just an example and not a final structure). You need to modify the code above like this:

Generator.prototype.createDirectiveFiles = function createDirectiveFiles() {
  if(this.args &amp;&amp; this.args[1]) {
        var module = this.args[1];
        this.appTemplate('directive', 'scripts/'+module+'/directives/' + this.name);
  }
  else {
        this.appTemplate('directive', 'scripts/directives/' + this.name);
  }
  this.testTemplate('spec/directive', 'directives/' + this.name);
  this.addScriptToIndex('directives/' + this.name);
};

Now, on executing the command

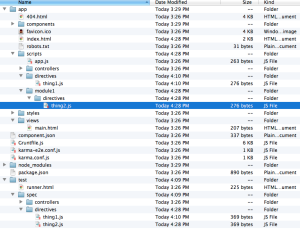
vsankaran-ml2:yeoman3 ksankaran$ yo angular:directive thing2 module1
   create app/scripts/module1/directives/thing2.js
   create test/spec/directives/thing2.js

it creates a module1 folder and places the directive file inside it. If you want to change the test script file location, you can change the this.testTemplate command.

yo2

That’s it folks. This is how you modify yo generator code for angular.

Introduction

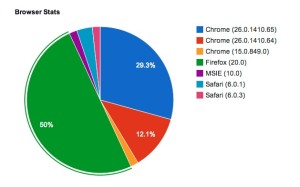
This tutorial will help you learn many things – how to use MongoLab API for CRUD operations, how to get browser info and version and how to use google charts. What we are going to achieve is, to create a real-time page which keeps updating the hits with browser info and also renders the page with the stats.

googlechart

Pre-requisite

You should at least know what MongoDB is and the flexibility it offers. You can read it right here. MongoLab is the cloud API provider for MongoDB. It also provides a REST interface for the same. Opening a account is free and so I would advise you to get one in case if you wanted to try MongoLab in your small projects. Do NOT try and use the key I used in my JavaScript. It’s not going to cost me anything because its a free account but again, I would have to manually login and clear those items if you use my ID for your demo apps :).

Storing browser info

The idea is to figure out the browser name and version and if it is already in DB, just increment the hit number else insert a new row.

/*
    Util method to get browserName and browserVersion from navigator. Source: stackoverflow.com.
 */
navigator.sayswho = (function () {
    var N = navigator.appName,
        ua = navigator.userAgent,
        tem;
    var M = ua.match(/(opera|chrome|safari|firefox|msie)\/?\s*(\.?\d+(\.\d+)*)/i);
    if (M &amp;&amp; (tem = ua.match(/version\/([\.\d]+)/i)) != null) M[2] = tem[1];
    M = M ? [M[1], M[2]] : [N, navigator.appVersion, '-?'];
    return M;
})();
if (navigator.sayswho.length &gt; 1) {
    navigator.cBrowserName = navigator.sayswho[0];
    navigator.cBrowserVersion = navigator.sayswho[1];
}

Now you do have browser name and version after the above steps. The task is to figure out whether the row is already present in DB or not. Querying the DB is easy with JavaScript but it is a shame that you can’t do that for commercial website because people will use the key to query your DB directly.

$.ajax( { url: "https://api.mongolab.com/api/1/databases/webdev/collections/hits?apiKey=<YOUR_KEY>&q=" + queryStr,
        type: "GET",
        contentType: "application/json",
        async: true,
        timeout: 5000,
        success: function (data) {
            ..
        },
        error: function (xhr, status, err) {}
    });

The insert and update code is pretty straightforward.

function updateDB(browser, version, hits) {
    var queryObj = {"browser": browser, "version": version};
    var queryStr = JSON.stringify(queryObj);
    // API Key needs to be changed to yours. This key is, however, a free limited space key and you can get one for yourself.
    // https://mongolab.com/welcome/ : Sign up and get 500MB free.
    $.ajax( { url: 'https://api.mongolab.com/api/1/databases/webdev/collections/hits?apiKey=<YOUR_KEY>&q=' + queryStr,
        data: JSON.stringify( { "$set" : { "hits" : hits } } ),
        type: "PUT",
        contentType: "application/json"
    });
}
 
/*
    Insert the new browser info here.
 */
function insertToDB(browser, version) {
    // API Key needs to be changed to yours. This key is, however, a free limited space key and you can get one for yourself.
    // https://mongolab.com/welcome/ : Sign up and get 500MB free.
    $.ajax( { url: "https://api.mongolab.com/api/1/databases/webdev/collections/hits?apiKey=<YOUR_KEY>",
        data: JSON.stringify( { "browser" : browser, "version" : version, "hits" : 1} ),
        type: "POST",
        contentType: "application/json"
    });
}

The posting part is now over.

Get browser stats

Let’s query the DB with browser name as sort order.

$.ajax( { url: "https://api.mongolab.com/api/1/databases/webdev/collections/hits?apiKey=<YOUR_KEY>&s="+queryStr,
    type: "GET",
    contentType: "application/json",
    async: true,
    timeout: 5000,
    success: function (data) {
        ..
    },
    error: function (xhr, status, err) { }
});

Google charts is a fantastic API to display charts. It is the easiest way and also the best I’ve seen.

google.load("visualization", "1", {packages:["corechart"]});
google.setOnLoadCallback(&lt;callbackmethod_to_query_DB&gt;);
.......
// after query
var data = google.visualization.arrayToDataTable(browserData);
var options = {title: 'Browser Stats'};
var chart = new google.visualization.PieChart(document.getElementById('chart_div'));
chart.draw(data, options);

That’s it folks! Take a look at demo here.

Introduction

It’s been sometime I’ve been here. So, I will just get started off. Today, I’m going to write about how to develop tic-tac-toe using AngularJS. The demo is more to understand the possibilities and simplicity of the framework.

What’s needed in the UI

9 boxes arranged in a 3×3 fashion like below:
square-design

Each of these boxes are divs and each div is binded to the data behind as usual

Template:

<div ng-repeat="row in rows">
    <div id="{{column.id}}" ng-repeat="column in row">
        <div ng-click="markUserClick(column)"> </div>
    </div>
</div>

Data:

$scope.rows = [
    [
        {'id' : 'A11','letter': '','class': 'box'},
        {'id' : 'A12','letter': '','class': 'box'},
        {'id' : 'A13','letter': '','class': 'box'}
    ],
    [
        {'id' : 'B11','letter': '','class': 'box'},
        {'id' : 'B12','letter': '','class': 'box'},
        {'id' : 'B13','letter': '','class': 'box'}
    ],
    [
        {'id' : 'C11','letter': '','class': 'box'},
        {'id' : 'C12','letter': '','class': 'box'},
        {'id' : 'C13','letter': '','class': 'box'}
    ]
];

Now, the logic is to make the JS think engine. It’s easy when you follow the strategy mentioned in wiki.

AI Algorithm:

  1. Win: If the AI has two in a row, it will place a third to get three in a row.
  2. Block: If the [opponent] has two in a row, the AI will play the third to block the opponent.
  3. Fork: Creation of an opportunity where the AI has two threats to win (two non-blocked lines of 2).
  4. Blocking an opponent’s fork:
    1. The AI will create two in a row to force the opponent into defending, as long as it doesn’t result in them creating a fork. For example, if “X” has a corner, “O” has the center, and “X” has the opposite corner as well, “O” must not play a corner in order to win. (Playing a corner in this scenario creates a fork for “X” to win.)
    2. If there is a configuration where the opponent can fork, the player should block that fork.
  5. Center: AI marks the center. (If it is the first move of the game, playing on a corner gives “O” more opportunities to make a mistake and may therefore be the better choice; however, it makes no difference between perfect players.)
  6. Opposite corner: If the opponent is in the corner, the AI plays the opposite corner.
  7. Empty corner: The AI plays in a corner square.
  8. Empty side: The AI plays in a middle square on any of the 4 sides.

For TicTacToe DEMO : Click Here.

That’s it folks. Enjoy playing.

Hey guys,

Recently, I have been working on integration of weather.com with Facebook via Facebook API calls. One of the challenges I faced is how easily can we get close friends and families without increasing number of calls. The Graph API is so vast and enables us to do it at one shot. It is for sure you can do it by different ways but if you prefer Graph API, this is how you do:

// The following API call gets the list of members from family list and displays in console.
FB.api("/me/friendlists/family?fields=members", function(response){ 
     console.log(response);
});
 
// and to get close friends
FB.api("/me/friendlists/close_friends?fields=members", function(response){ 
     console.log(response);
});

As you can see from above, family and close_friends are keywords/id by itself and don’t need the specific group ID. Oh, and don’t forget – you need read_friendlists permission for your APP or you get it in your scope during your login.

If you are a looking at getting both members at one shot, there is always FQL.

FB.api(
    {
        method: 'fql.query',
        query: 'SELECT uid FROM friendlist_member WHERE (flid IN (SELECT flid FROM friendlist WHERE owner=me() and type = "family") or flid IN (SELECT flid FROM friendlist WHERE owner=me() and type = "close_friends"))'
    },
    function(response) {
        console.log(response);
    }
);